

Improving Staff Flow and Sterilization Room Layouts in Your Dental Office

If your dental clinic is cramped, cluttered, and sluggish during peak periods, your design may be to blame. Most clinics throughout Toronto and the GTA are plagued with getting through the day efficiently—particularly in sterilizing instruments and keeping things moving safely. That’s where optimizing staff flow and sterilization room design can make an enormous impact. An intelligently designed space not only increases productivity but also enables your staff to work faster and safer.
Here at this blog, we’ll take you through planning and optimizing your sterilization space with intelligent design decisions based on Canadian guidelines. Whether you’re expanding or constructing from scratch, you’ll find easy steps to optimize staff flow, minimize congestion, and get your clinic a more comfortable place for patients and professionals alike. Let’s examine how the correct configuration can have your dental clinic running like a well-oiled machine.
Table of Contents
Why Staff Flow & Sterilization Design are Important
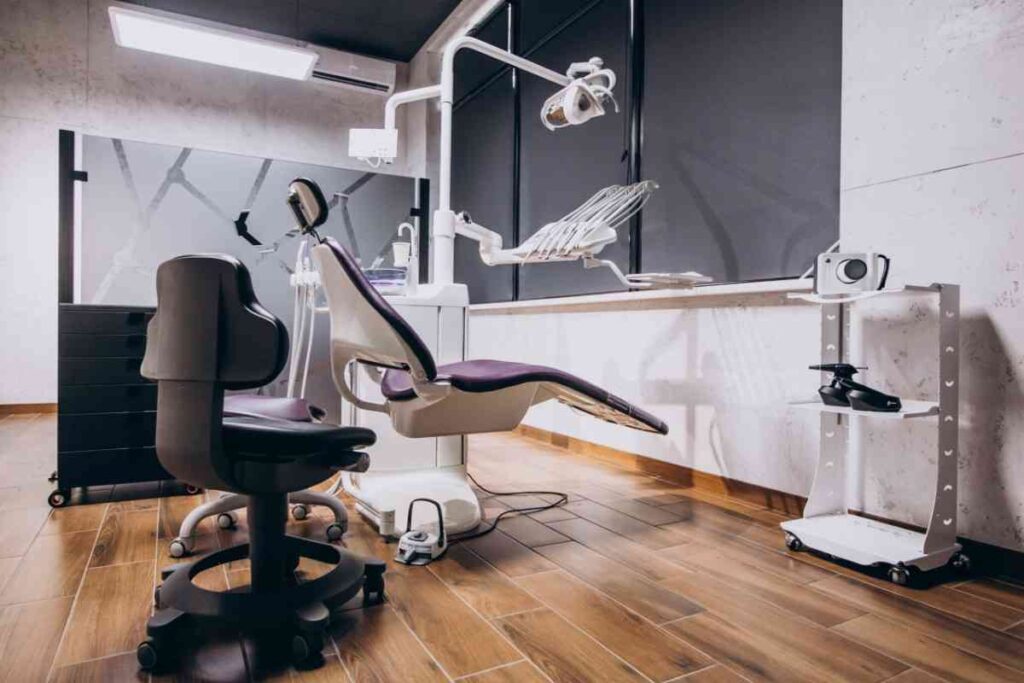
Time and safety are all that matter in a high-volume dental clinic. If your staff can travel comfortably between treatment rooms, sterilization zones, and storage without intersecting or slowing each other down, the entire clinic operates more smoothly. Effective staff flow prevents stress, eliminates bottlenecks, and keeps infection control at an optimum level—vital in today’s healthcare world.
Design of the sterilization room is a critical factor in patient and staff safety, as well as staff productivity. Poor planning in the layout can contribute to cross-contamination, increased turnaround of instruments, and even compliance with hygiene laws. Conversely, properly organized sterilization space—a distinct “dirty-to-clean” process—keeps each instrument effectively cleaned, disinfected, and warehoused without retracing steps or confusion.
Enhancing staff movement and sterilization room planning in your dental practice is not merely a matter of looks—it’s about creating a safer, better-running clinic. By designing with care, adherence to Canadian standards, and integration with your staff’s routine operations, you can enhance both care quality and operational velocity. It’s an intelligent investment that keeps your practice compliant, professional, and poised for growth.
Understanding Sterilization Workflow Zones
There should be a properly designed sterilization room in your dental clinic that has a well-defined and sequential process—usually referred to as the “dirty-to-clean” workflow. The arrangement guarantees that the dirty instruments never touch the clean ones, ensuring high levels of infection control and protecting your staff and maintaining their efficiency.
There are generally three primary zones in an efficient sterilization design:
Receiving & Cleaning Zone
This is where instruments are initially introduced as used. It has sinks, ultrasonic cleaners, and pre-soak stations. Personnel utilize this area to rinse, scrub, and remove foreign material before advancing to the next step. Isolating this area from the rest helps avoid cross-contamination.
Preparation & Packaging Zone
Following cleaning, equipment is examined, dried, and packaged for sterilization. The area must provide sufficient countertop space and equipment to enable personnel to move easily. It serves as a “neutral zone” between dirty and clean, minimizing any risk of recontamination.
Sterilization & Storage Zone
This last area houses autoclaves or sterilizers. After being sterilized, the instruments are placed in clean, dry cabinets to await use. This area should be strictly clean and have clear demarcations or signs to demarcate it from the other areas.
By planning your sterilization room according to these zones of workflow, you enhance staff productivity and make your dental clinic operate at the highest levels of hygiene. Aside from preventing infection and improving staff morale, it also complies with Public Health Ontario guidelines and other regulatory agencies in Canada.
Key Layout Principles for Efficient Flow
Creating an efficient dental clinic layout goes beyond aesthetics—it directly impacts how smoothly your staff can move and work throughout the day. Whether you’re planning a new dental office renovation or upgrading an existing layout, applying key design principles can improve productivity, reduce stress, and enhance patient care.
1. Minimize Backtracking and Cross-Traffic
One of the key principles is having a logical flow that doesn’t allow staff to back track or intersect unnecessarily. Position sterilization rooms, operatories, and supply areas to facilitate one-way movement, particularly for instrument handling—dirty to clean.
2. Centralize Shared Resources
Put frequently used supplies such as sterilization gear, PPE, and materials in central or semi-central locations. This minimizes walking time between stations and helps with more effective time management.
3. Zoning by Function
Separate your dental practice into functional zones: clinical (operatories), sterilization, admin/reception, and staff support zones. Separate definition of these zones prevents confusion, enhances infection control, and maintains privacy where necessary.
4. Line of Sight and Visibility
Plan your layout to enable staff to have visual contact where required—such as between the sterilization area and operatories. This simplifies communication and facilitates monitoring of workflow without excessive movement.
5. Unobstructed, Wide Pathways
Make sure corridors and path-of-travel areas are of sufficient width for several team members or equipment carts to pass. This avoids congestion during peak hours and aids in effective staff flow.
6. Flexibility for Future Expansion
Your layout should support future changes, such as adding operatories or upgrading sterilization technology. Flexible design keeps your practice modern and scalable without needing major overhauls.
By following these key dental office layout principles, you’ll create a space that supports better staff circulation and promotes a safe, organized, and compliant environment. An optimized layout isn’t just about convenience—it directly improves your clinic’s operational success and patient experience.
Enhancing Staff Flow with Intelligent Elements
Enhancing staff flow within your dental practice is not merely a matter of layout—it’s also about incorporating intelligent design elements that enhance more efficient daily operations. These thoughtful touches can eliminate delays, restrict unnecessary movement, and help your clinical team get more done in less time.
1. Hands-Free Features
Hands-free faucets, doors, and soap dispensers installed in the sterilization room and the operatories enhance sanitation while enabling staff members to move freely without interfering with workflow. The features also enhance infection control standards, which are significant in all dental offices.
2. Additional Features: Color-Coding and Visual Cues
Utilizing colour-coded zones, drawers, or labels allows team members to quickly recognize tools and supplies. Visual organization saves time, avoids confusion, and keeps staff moving efficiently through their work, particularly in sterilization zones.
3. Integrated Storage Solutions
In-cabinet storage, overhead storage, and pull-out drawers at the base of workstations keep all necessary items within easy reach. Storing materials strategically—like near chairs or within treatment rooms—eliminates back-and-forth movement.
4. Task-Based Lighting
Correct lighting is crucial, not only for therapy but also to help staff accomplish tasks quickly and safely. Proper, bright lighting in sterilization areas and supply cabinets minimizes errors and maintains movement running smoothly.
5. Technology Integration
Provide your clinic with computer charting stations, wireless headsets for interstaff communication, and sterilized instrument mobile carts. These features minimize interruptions and maintain staff better coordinated during the day.
6. Specialized Traffic Flow
Create separate traffic routes for dirty and clean instruments, patients, and personnel. This not only optimizes flow but also sterilization room layout adherence by reducing the likelihood of cross-contamination.
By including these intelligent design components in your dental practice renovation, you can greatly enhance staff workflow and productivity. By designing a workspace that responds to movement and assists your staff, you make your dental practice a safer, more streamlined operation.
Phased Renovation Plan for Steri Areas
Renovating your dental clinic’s sterilization area doesn’t have to suspend your operations. A phased renovation plan enables you to update your sterilization design and enhance staff flow—without closing down your clinic. With meticulous planning and execution, you can effectively upgrade your space safely.
1. Assessment and Planning Phase
Begin with an expert evaluation of your sterilization room current workflow and layout. Identify current bottlenecks, storage needs, and compliance deficiencies. This step should also involve consultation with dental renovation professionals aware of infection control regulations and effective staff circulation.
2. Design and Approval Phase
Second, design in detail a layout in compliance with present standards of dental office design that will improve your areas of sterilization. Have clean and dirty areas properly separated, storage made easily accessible, and hands-free options. Get required approvals from local health agencies and agree on your renovation schedule.
3. Preparation and Temporary Setup
Before construction begins, set up a temporary sterilization station to maintain infection control and avoid delays in patient care. This could be a mobile unit or a converted operatory with proper zoning for clean and used instruments.
4. Renovation Execution in Stages
Divide the renovation into small, manageable phases—starting with one section of the sterilization area while the other remains functional. For example:
Phase 1: Install new storage and cabinetry on one side.
Phase 2: Replace plumbing and electrical systems.
Phase 3: Install hands-free equipment and maximize lighting.
This phased methodology reduces downtime and facilitates smooth transitions between the old and new configurations.
5. Final Testing and Staff Training
After the renovation is finished, perform a complete inspection to make sure everything is up to sterilization standards. Train staff in the new design, equipment, and flow procedures. Reiterating best practices here secures the advantages of your newly upgraded sterilization area.
A step-by-step renovation schedule for steri spaces is the intelligent path to enhancing efficiency without sacrificing patient safety and staff productivity. Renovating in stages allows your dental practice to stay open while building a cleaner, faster, more compliant workflow.
ROI & Compliance Benefits
Investing in a carefully designed dental office sterilization room design and enhanced staff flow design is not merely about functionality—it has a direct effect on your clinic’s ROI and long-term compliance.
1. Enhancing Operational Efficiency and ROI
A well-planned sterilization area decreases employee movement, minimizes instrument turnaround time, and eliminates workflow interruption. This translates to increased patient turnover, reduced downtime between cases, and increased billable hours. In the long run, this improved employee flow can greatly boost your clinic’s productivity and profits, and it provides an obvious ROI on your renovation project.
For instance, by reducing time spent on tool searching or movement through congested areas, workers can devote more time to patient care. This boosts patient satisfaction and loyalty, which is another financial long-term advantage.
2. Assuring Regulatory Compliance
Dental offices in Ontario and throughout Canada must comply with stringent infection control and sterilization protocols. A well-designed sterilization design ensures adherence to RCDSO (Royal College of Dental Surgeons of Ontario), Public Health Ontario, and other regulatory agencies’ guidelines.
A compliant sterilization area features:
Tightly separated clean and dirty zones
Hands-free sinks and dispensers
Sterilized instrument storage that meets standards
Smooth surfaces that are easy to clean and disinfect
Compliance with these standards shields your practice from expensive fines or closures during inspections. Beyond that, it serves to show your dedication to ensuring patient safety.
3. Minimizing Risk and Liability
An inefficiently planned sterilization room may cause cross-contamination, staff injury, or procedure delays. These dangers not only affect your staff but also put your clinic at risk for legal liability. A wise renovation eliminates these dangers by producing an ergonomic and clean working environment that facilitates infection control procedures.
Conclusion
Designing an effective dental office sterilization room layout and enhancing staff flow is more than a design improvement—it’s a wise investment in your clinic’s success. A well-organized office increases productivity, assists in infection control, and maintains compliance with Canadian health regulations. By centering attention on proper zoning, intelligent design aspects, and phased renovation planning, you can simplify daily functions while enhancing staff and patient safety. If renovation is in the plans, having a dental renovation professional as your partner guarantees that your design serves both functional and regulatory purposes. Having a well-planned strategy for your sterilization area translates into long-term ROI, lower risk, and less interruption for all involved.
FAQs
What is the ideal layout for a dental sterilization room?
An ideal sterilization room layout separates clean and dirty zones clearly to avoid cross-contamination. It should follow a linear workflow: receiving, cleaning, rinsing, sterilizing, drying, and storage—all in one directional path.
Why is staff flow important in a dental clinic?
Efficient staff flow minimizes time wasted between tasks, reduces errors, and improves patient care. It also helps avoid congestion in key areas like the sterilization room, operatory, and hallway intersections.
How do I ensure my sterilization room meets RCDSO compliance?
Ensure the room has proper zoning, hands-free sinks, appropriate ventilation, and surfaces that are easy to disinfect. Working with a dental renovation specialist can help you meet RCDSO and Public Health Ontario standards.
Can I renovate my sterilization area without closing my clinic?
Yes, with phased renovation planning, many dental offices continue operations during upgrades. A professional team will create a schedule that minimizes disruption while maintaining patient safety and compliance.