

How to Integrate Dental Equipment During clinic renovation Toronto
Renovating a dental clinic is an exciting but often overwhelming experience – especially the bit about getting all the new dental equipment up and running during a clinic renovation in Toronto . Lots of dentists have had sleepless nights worrying about workflow issues, delays or finding out the hard way that new gear just won’t fit like they expected. Most of these problems arise because the planning and installation process hasn’t been broken down clearly or rushed through too quickly.
This guide is here to walk you through the whole process in a no-nonsense, straightforward way. By the end of it, you’ll have a clear idea of how to bring new equipment on stream smoothly, spot potential pitfalls before they cost you an arm and a leg, and create a clinic that is a joy to work in for both patients and staff.
Why Does Good Dental Equipment Integration Matter for a Toronto Dental Clinic ?
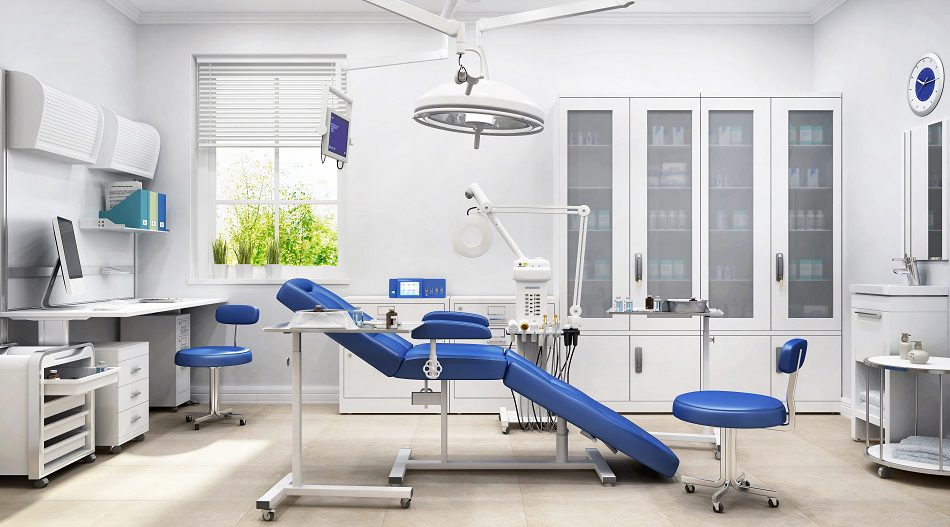
Getting your dental equipment right during a clinic renovation in Toronto is probably one of the most important jobs you have to get right. When you do it all carefully, your team can move at their best, work safely, and keep the patient flow running smoothly. Good integration is all about keeping clutter to a minimum, making sure you can get to what you need when you need it, and maintaining a clean, hygienic work environment. And that makes a big difference to how easy it is to get through a typical day as a dentist or their assistant.
And the good news is that strong integration will pay off in the long run too. When all the behind the scenes bits like MEP systems, suction lines, air lines and electrical connections are all working together in harmony – your dental chairs, delivery units and sterilisation equipment will be running more reliably.
What You Need to Do Before Your Renovation Even Starts : Planning Your Dental Equipment Fitout in GTA Clinics
Getting your planning right is the key to a smooth renovation especially when you have to get dental equipment set up in a clinic renovation in Toronto. Before you even start tearing things down, take some time to go over your clinic’s layout, how many operatories you’ll need and what dental equipment you’re actually going to need. Doing this upfront can help you avoid all sorts of problems like having too little space, poor workflow or discovering that your equipment just won’t fit in with the rest of your setup. And in a place like GTA, space is at a premium and patient flow is high so it’s really worth getting it right.
Ideally, your plan should involve getting your equipment supplier and renovation team on the same page early on so everyone is clear on where all the key bits of equipment – like dental chairs, delivery units, suction systems, air lines and electrical outlets- should go.
Also Read: Dental Office Renovation Cost in Toronto & GTA In 2025
Step-by-Step Guide to Integrating Dental Equipment During Clinic Renovation in Toronto
A successful clinic renovation really does depend on having a clear, well-organized plan in place. When you’re integrating dental equipment during a clinic renovation in Toronto, each step you take is like laying the groundwork to prevent delays, mistakes, and last-minute costly changes. Planning, utility prep, installation, and testing all have to come together in a smooth workflow that works for your team and creates a safe environment for your patients.
Here’s a simple step-by-step guide to follow:
- Get Your Final Layout Sorted Out: First, figure out exactly where the dental chair, delivery unit, cabinets, your assistant’s tools, and sterilization items are going to go. A solid layout is essential to making sure your team can move around safely and get the job done efficiently.
- Coordinate with Your Supplier and Contractor: Share your exact measurements and equipment specifications with them so they can get the plumbing, electrical, suction, and air line placements set up right.
- Get the Utilities Ready (MEP Alignment): Install the water lines, suction lines, air compressors, power outlets, data cables, and lighting connections – and make sure each operatory has the right hookups for installing the chair and getting the equipment set up.
- Get the Dental Equipment Installed: Set up the dental chairs, delivery systems, compressors, and carts in the places you’ve planned for them. Double-check that everything fits properly and supports the workflow you need.
- Test All the Equipment and Utilities: Run suction tests, check the air pressure, make sure the electrical system is working smoothly, and get the chair moving smoothly. Fix any problems right away before you start bringing in patients.
- Get Your Team Involved and Review the Setup: Give your staff a chance to test out the operatory and make sure the setup they’ve got is going to support comfort, safety, and good ergonomics.
The Most Common Mistakes GTA Dentists Make When Integrating Equipment During a Clinic Renovation
A lot of clinics run into problems when they try to integrate dental equipment during a clinic renovation in Toronto without doing their homework. These mistakes can lead to delays, extra costs, and equipment that just doesn’t work the way the dentist had hoped. Understanding what these issues are before you start can really help you prepare better and avoid a lot of stress during the renovation.
Here are the most common mistakes GTA dentists make:
- Not Planning the Utilities Before Construction: Plumbing, suction lines, air lines, and power outlets need to be put in the right place from the start. If you skip planning the utilities, you might end up with dental chairs and delivery units that don’t fit right with the MEP system – and that can lead to a real mess and a lot of extra work and expense.
- Picking Out Equipment Before Finalizing the Layout: Buying chairs, carts, or cabinets too early often causes problems with getting everything to fit. Confirming the operational layout first makes sure every item’s got plenty of space and supports a smooth workflow.
- Using a Contractor with No Dental Experience: General contractors might not understand what suction requirements, compressor placement, or equipment setup entails – and that can create long-term issues that disrupt your daily operations.
- Overcrowding the Operatory: A lot of dentists try to cram too much equipment into a small room, which cuts down on movement space and creates ergonomic problems for the staff.
- Don’t Skip Equipment Testing at the End of the Project: Every clinic should really test air pressure, suction strength, water flow, and chair movement before opening up to patients. Skipping this step can lead to a bunch of surprises once the patients start showing up.
Dental Equipment Installation Checklist for a Smooth Renovation in Toronto and the GTA
Having a simple checklist handy can save your sanity when Integrating Dental Equipment During a clinic renovation in Toronto. A clear list can save you from mistakes, make sure the MEP stuff is all lined up, and ensure each operatory is ready for your team and your patients to function smoothly. This checklist is specifically designed for GTA clinics that want to get their renovation done quickly and with as little hassle as possible.
Here’s a practical checklist to help you along:
- Double-check the final layout of your operatory and where all the equipment is going to go
- Make sure you share the nuts and bolts of your equipment with your contractor and supplier – the specs, the make and model, the whole shebang
- Check that you’ve got enough space for dental chairs, delivery units, and carts – you don’t want to find out the hard way that you need more room
- Get the plumbing, suction lines, air lines, and electrical outlets sorted out before anything else
- Make sure you’ve got the right data cables and lighting connections in place
- Verify where the compressor and vacuum system are going to go – don’t want to have to move them later
- Get the dental chairs installed and make sure they’re securely mounted – safety first!
- Connect up the water, air, suction, and electrical systems – this is the part where you want to make sure everything works smoothly
- Test the air pressure, suction strength, and chair movement – this is where you find out if anything is leaking or broken
- Sort out the ergonomics of your equipment so that both dentists and assistants can use it with ease
- Have a thorough look at the sterilization area to make sure it’s set up to work efficiently
- Do a full function test before you start seeing patients – you want to make sure everything is working as it should be
By following this checklist, you can make sure your Toronto or GTA clinic renovation goes smoothly and that you’re up and running in no time.
Conclusion
A successful dental renovation comes down to doing your homework, getting the MEP stuff right, and taking the time to do the equipment installation properly. When you Integrate Dental Equipment During a clinic renovation in Toronto, every step you take should be focused on making the workflow better, the operation safer, and the long-term reliability of your equipment. By focusing on getting the MEP alignment right, smart placement of equipment, and clear communication with your renovation team, you can create a space that works well for your staff and your patients. This approach will help you avoid delays, cut costs, and end up with a modern facility that lets you deliver top-notch care.
FAQs
-
How long will it take to get my dental equipment set up after a clinic renovation in Toronto?
Most clinics need about a week to ten days to get everything up and running after the construction is done. This lets the team sort out the chair, hook up the utilities, test out the suction, and make any final adjustments to make sure everything is working smoothly.
-
What kind of utilities do I need to install dental chairs and delivery units?
You’ll need plumbing, electricity, suction lines, air lines, and data cables for the chairs. And let me tell you, it’s a lot easier if you get all this sorted out during the construction phase – if you don’t, you might have to close the clinic for a bit while you sort it all out.
-
Can I just keep the clinic open while I get all this equipment installed?
Yeah, some places in the GTA do that – they renovate in stages so they can stay open a bit longer. But the thing is, if you’re doing any real renovations – like getting utilities or major equipment set up – you might have to close up shop for a little while. Just to keep everyone safe and get it all done right.
-
Why is it so important to figure out the layout before buying all this equipment?
Because if you don’t get the layout right, you end up with a bunch of equipment jammed into a tiny space. This makes it hard for the staff to move around and can actually slow down the whole operation. So, let’s get that sorted out before we buy anything!
-
What happens if you don’t do the right planning for all this equipment?
Well, if you don’t get the utilities laid out correctly, the suction might not work right, the air pressure could be low, there might be electrical issues… and the worst part is, fixing these problems can be a real pain – and a big expense. So yeah, get it right the first time is the way to go.